WageSum Angular UI
“Bonum vinum hedera non indiget”
Rough translation: “Good wine doesn’t need adverts”. This is wise, however sales and marketing are on opposite side and I tend to agree with them. One of the biggest problem with backend designers and architects is that they create APIs and implementations in such a way that, although functionally appropriate, it is difficult to use in practice and hard to integrate it with other systems.
Because of that it can be useful to change the side and take a look at the result with UI designer’s eyeglasses. In addition to that it is easier to sell your product within the company.

Regarding that I created Angular UI for WageSum server side application. Why Angular? There are other frameworks, but this is one of the most popular (okay, don’t blame me react and flutter. I will take a look at them as well.). Coding style is like Spring Framework, widely used and well supported. It uses TypeScript which is a syntactic superset of JavaScript which adds static typing. There are plenty of articles about it.
One additional personal point is that I created a pet project in 2019
and it is still working today (December of 2022), although I have run just some
npm upgrade commands once in a while. Not too many UI frameworks can repeat that.
Of course I’m not a designer or UI specialist. They could identify lots of deprecated things, bad practice or bugs. Feel free to send pull requests! :)
Development diary
1. Project base
First of all we need latest NodeJS, then
Angular CLI. Both of them should be upgraded time to time, fortunately
it is just some npm upgrade or npm audit fix (sometimes with –force) commands.
These can help you to fulfill security requirements as well.
npm install -g @angular/cli

ng new wage-sum-angular-ui
There are some questions. Routing ON, then I chose SASS but it’s up to you.
I don’t use any extraordinary components. After that ng serve -o will start
the application.
IntelliJ Idea is a natural choice, but web extension is not free. As a result I could live with Visual Studio Code with some extension ( Angular Language Service, Sass extensions) , it’s more than enough in my case.
I’m not a graphical designer, but I like aesthetic UI, so I picked up Material design Angular components. Most of my targets are already implemented, so this is a comfortable decision for me.
 ng add @angular/material

    ? Choose a prebuilt theme name, or "custom" for a custom theme: Deep Purple/Amber  [ Preview: https://material.angular.io?theme=deeppurple-amber ]
    ? Set up global Angular Material typography styles? No
    ? Include the Angular animations module? Include, but disable animations

    Please consider manually setting up the Roboto font.

# It wants roboto font. As you wish:
npm install typeface-roboto --save
Generated HTML page could be cleaned up, just stayed with ‘App is running’ message. Just for testing Material function there can be a simple slide button. It will be red, because app.module.ts needs MatSlideToggleModule module import. After that slide button is visible.
<mat-slide-toggle>Toggle me!</mat-slide-toggle>
Running of ng test won’t survive our changes, some testing imports has to be there
in app.component.spec.ts.
import { MatSlideToggleModule } from '@angular/material/slide-toggle';

...
imports: [
        RouterTestingModule,
        MatSlideToggleModule
      ],
...
So far so good.
2. OpenAPI generation
Previously there was prepared WageSum OpenAPI description. Based on that TypeScript/Angular client generation is straighforward. First option is to use openapi docker image:
docker run --rm -v ${PWD}:/local openapitools/openapi-generator-cli generate -i https://raw.githubusercontent.com/lsmhun/wage-sum-server/main/api/wagesum-openapi.yaml -g typescript-angular -o /local/build
There is an openapi generator npm package as well, as you can see it in this article.
npm add @openapitools/openapi-generator-cl
At this point I had some concerns, that it should be generated every time on-the-fly or taking snapshots. During production build noone wants to see changing API definition. By the way this is one reason of contract tests.
Finally I decided to stay with build directory and this should be added to .gitignore .
Regarding convention over configuration
package.json could be modified in
script{ ... } paragraph. With pre or post prefix code generation will run
before/after defined commands (in my case before npm build/serve/test).
This can be slow, but most of the cases ng serve -o is enough.
(you can define an independent module with dist, if you want.)
...
 "generate:api": "openapi-generator-cli generate -g typescript-angular -i https://raw.githubusercontent.com/lsmhun/wage-sum-server/main/api/wagesum-openapi.yaml -o ./build/openapi",
    "prestart": "npm run generate:api",
    "start": "ng serve",
...
After that point an example employee could be defined in main component.
import { Emp } from 'build/openapi/model/emp';
...
exampleEmp: Emp = {
    userName: "man1",
    firstName: "first",
    lastName: "last",
    empId: 2,
    mgrId: 1,
    status: Emp.StatusEnum.Active,
    type: Emp.TypeEnum.Manager
};
3. Page design, routing
Everything is awesome! We’ve got lot of things, but nothing real. Let’s start to create our components. WageSum app is basically CRUD application, which has employee and salary REST interfaces.
There are just few views:
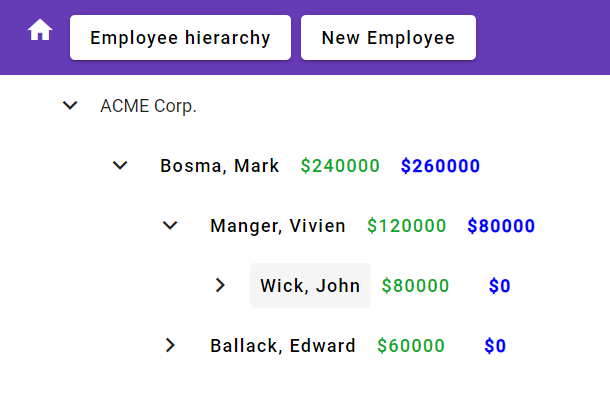
- tree view (emp-tree)
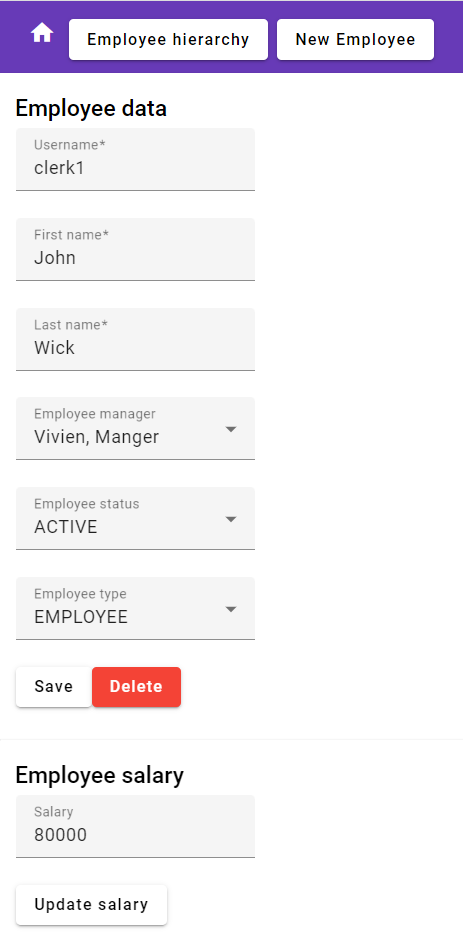
- employee from (emp-details)
- error 404 (page-not-found)
- header navigation (head-nav)
- login page (not needed yet)
ng generate component emp-tree
ng generate component emp-details
ng generate component emp-tree
ng generate component head-nav
There should be navigation which is available with
Angular routing, so there are some
basic routing config in AppRoutingModule.
 const routes: Routes = [
  { path: 'emp-tree', title: 'Employee hierarchy', component: EmpTreeComponent },
  { path: 'emp/:id', title: 'Employee details', component: EmpDetailsComponent },
  { path: '',   redirectTo: '/emp-tree', pathMatch: 'full' }, // now redirect to `emp-tree`
  { path: '**', title: 'Page not found', component: PageNotFoundComponent },
];
In app-head-nav we need two links and simlify the app.component.html with minimal content:
<app-head-nav></app-head-nav>
<router-outlet></router-outlet>
Routing started to work, however our tests are broken. Fortunately error messages are clean, so this could be fixed easily. Nothing special, but our links are working and users can change pages. Hurray!
There are many material components, which are used in this application. These could be collected in material.modules.ts and just this “collection” should be imported in app.module.ts. Of course it could result a lot of unnecessary included sources, fortunately Angular can handle that with “shuffle”, when it will drop not used elements.
It can be checked with app-head-nav, then others will be sorted out. Next is the employee form, not for the design, rather for functionality.

If routing started to work, then we need empId parameter. @Input annotation is designed for that, but null-safety could be more strict than ever. tsconfig.json can solve this issue with “compilerOptions”: {“strictPropertyInitialization”: false, ..} configuration.
5. Environment, tree view and employee editor form
To be honest I copy-pasted tree with dynamic data example except the static repository. I changed to OpenAPI generated services, which can be visible in emp-tree.component.ts.
At this point HTTP request-response pairs are unavoidable. WageSum doesn’t consume too much resources, however some bugs were detected during testing it with UI. This is one of the benefits of this small development.
Environment definition is an other important topic, which should be handled
correct. This build guide describe it
with minimal configuration, so our app could be started ng serve --configuration=development -o
after this point.
Proxy configuration is an other mandatory change because of CORS. I used this article as an examle. BASE_PATH was already defined, so in app.module.ts it should be registered in providers list. It is important to reach our backend with this configured base path.
providers: [{ provide: BASE_PATH, useValue: environment.API_BASE_PATH }],
In Chrome with Debug mode it’s visible that all request are coming to
/api address, which will be forwarded to correct URL by proxy module.

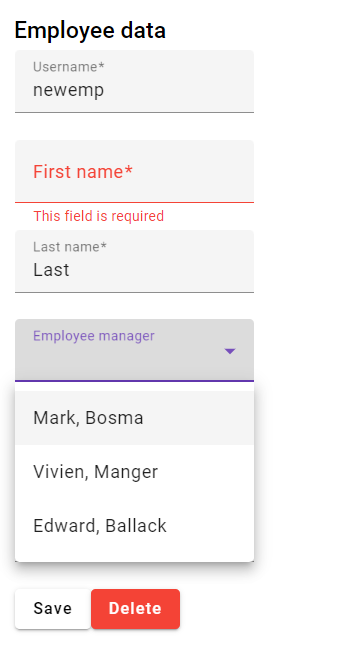
Employee form needs FormsModule import and I stayed with minimal form field example. There could be more validation, but basics are working.
I faced two interesting bugs. First was specific: if one employee is selected, routing change doesn’t react (ie: new employee url change). Sollution proposal in this or that articles: component should be subscribed on routing changes.
Animation was the second interesting behavior. Request and response could take time, so there should be a loading icon for customers. Unfortunately animation didn’t work, however mat-progress-spinner was designed for that. Then I found the relevation because in the beginning NoopAnimationsModule was chosen, however BrowserAnimationModule is a must-have for moving elements.
6. Salary elements
Employee CRUD functionality works now, there should be the same for salary. Actually this was the original target: salaries and wage summary.
Fortunately there could be a minimalistic component included into emp-tree.component.html. This will use incoming empId as a parameter and it will collect wage sum and salary. Green color is for employee current salary, wage summary is in blue color.
There is an other component, although it’s the same as emloyee details, just with salary REST interface.
7. Fixing tests
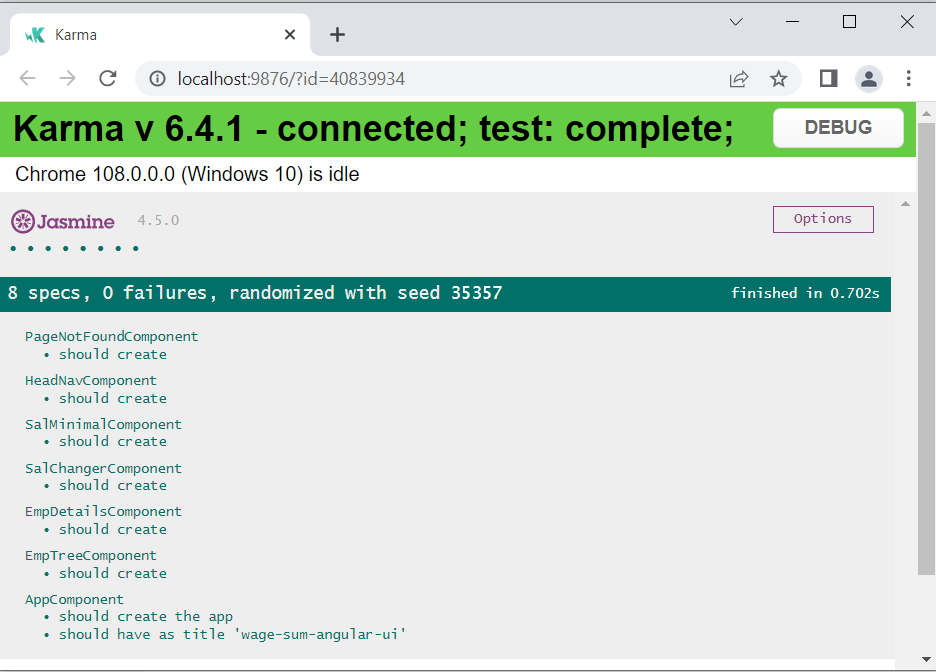
As you can see TDD was in background. There should be at least the minimal unit tests for furhter development.
First of all there should be imported UsedMaterialModules in test source files. In production environment there should be just the mandatory components, so it is just laziness. Apart from that we need FormsModule and BrowserAnimationsModule in some cases.
Mocking and dependency injection is the second focus point. Most of them could be observed in emp-details.component.spec.ts.
HttpClientTestingModule can handle missing HttpClient dependecy injection.
Angular uses RxJS for asynch and reactive calls, so knowledge could be extended with some RxJS background. During test creation we need some Observable<> definitions.
Afer that spyOn() method can be used with fluent format.
    // given salService
    const salService = TestBed.inject(SalService);
    const httpEventSal: HttpEvent<string> = new HttpResponse<string>({ body: "123" });
    spyOn(salService, 'getSalByEmpId').and.returnValue(of(httpEventSal));
Ordering is important! First we need TestBed.configureTestingModule(), then there could be the mocking injection and spyOn() usage.

After lint installation some code cleaning could be scheduled. First run will install ESLint (or any other lint tool).
ng lint --fix
During development it should be automatically executed, however I applied it just after everything.
8. Dockerize
Containers are base part of all microservices. I followed this howto: Dockerize Angular application. This example installs and builds everything in one docker and output directory (dist) will be added to nginx container.
It can run forever and consume all resource of a strong computer.
Alternative approach: npm run build --prod and
add just dist directory to nginx container with a different
Dockerfile.
docker build -t lsmaster/wage-sum-angular-ui:0.0.1 .
